Archive

Category Archives for "Recommended Resources"

La Crosse Technology 308-1414B: The Best Budget Home Weather Station?

La Crosse Technologies 308-1414b heading

With my Ambient Weather WS-2902A Osprey now running smoothly for more than six months, I realized I needed a weather station in my study to keep an eye on my local region's atmospheric conditions. At this point, the La Crosse Technology 308-1414B grabbed my attention.

OK, full disclosure first. The La Crosse 308-1414B is not my first or primary weather station, as you would have been able to gather from my first sentence in the introduction.

My primary weather station, the Ambient Weather WS-2902A already meet all the demands and functionality needed from an advanced to a professional weather station. After six months, my initial impressions were just reinforced. 

(If interested, you can read all about the Ambient Weather WS-2902A Osprey in this article.)

This means I already have a high-end weather station that provides me with all the meteorological sensor data, online connectivity and data logging I require for my weather research and observation.

I only required a basic home weather station that could display essential meteorological data like indoor and outdoor temperatures, indoor and outdoor humidity, and weather tendencies that can be quickly and clearly viewed.

After some research, it became clear that the La Crosse 308-1414B is a very popular weather station that came highly recommended. It also fitted my budget for what I considered to be a quality entry-level station.

The Lacrosse display console is now sitting proudly on my desk, fitting in seamlessly between all the high-tech and desktop screens.

Get more information and pricing on the La Crosse 308-1414B by following this link.

The La Crosse 308-1414B In A Nutshell

La Crosse Technologies 308-1414b

For those of you not familiar with La Crosse Technologies, the company is known for manufacturing high quality entry-level to intermediate weather stations, while managing to keep prices affordable at the same.

This La Crosse weather station is one such example. It comes in a plain, but well-packaged box, revealing a classy display unit, outdoor weather sensor, an AC adapter, and a small setup leaflet.

The 308-1414B comes with an indoor & outdoor temperature sensor (connected via a wireless connection), an indoor & outdoor humidity sensor, alarm clock, and date display, as well as weather tendency indicators.

And this is all the beginner weather enthusiast needs. The La Crosse 308-1414B ticks all the boxes. It may not have all the weather sensors for measuring every possible atmospheric variable, but no novice needs it. It's affordable enough for you to upgrade at any time.

For me it is just perfect as a second unit that sits neatly on my desk, ready to provide me with the weather essentials, while my advanced weather station is doing the heavy lifting elsewhere in the home and outside.

What follows is my experience with setting up the La Crosse 308-1414B weather station, followed by my impressions, and conclusion.

Packaging And Components

Packaging And Components

Packaging

As I already mentioned, the La Crosse 308-1414B comes in a plain cardboard box without as much as a picture or graphics on it. (Unlike my Ambient Weather Osprey weather station and the Davis Vantage Vue which came in colorful boxes, covered with images, graphics and text information.)

Clearly, the plain packaging reflected the no-frills approach of La Crosse which runs through the whole weather station, from design to setup. But that is a good thing!

The box contains the main display unit, outdoor sensor, AC adapter, and a small setup guide. What is evident right from the start, is the care that was taken to make sure all the components were safely and tightly packaged. Already a good sign.

Indoor Weather Display 

The black display unit looks and feels surprisingly solid and well-built. It even looks classy and upmarket, but the biggest surprise came when I switched on the screen...

I wasn't expecting this level of brightness and clarity from an entry-level weather station. It even literally outshines my Ambient Weather display, costing six times more. This says a lot for a display unit in this price range.

(Yes, a personal weather station shouldn't be judged by its display quality, and Ambient Weather WS-2902A Osprey is known not to have the best display on the market, but it is still a noteworthy observation.)

The display is powered by 3 AAA batteries, or an AC adapter, and can be hung against the wall or put on a flat surface using the built-in stand. 

The buttons operating display can be found on the up and front of the console: 

Five buttons for setting up and making adjustments to the station is situated on the top of the unit, with two buttons placed on the front of the display.

The two buttons you may use more frequently are conveniently placed on the front:

  1. Alerts Button: Pressing and holding this button allows you to adjust the values which will trigger an alert when exceeded. 
  2. Alarm Button: Pressing and holding this button allows you to set the alarm, or enable/disable it completely.

The five buttons on the top of the display will probably be used less frequently, but are still easily accessible and well organized:

  1. Arrow Keys: These buttons can be found on the outer left and right sides, and are used to adjust the values of any setting you want to change. 
  2. Time Set Button: Situated second from the left, this button will only be used when setting up the weather station for the first time, or when you need to make any changes to the original settings.
  3. Snooze/Light Button: Conveniently placed in the center of the display and also larger than the rest, this button is used to snooze the alarm. It also functions to switch on the display or change the brightness settings (depending on whether the AC adapter is plugged in).
  4. Heat/Dew Button: Situated second from the right, this button display the Heat Index when pressed once. Press it twice and the Dew Point is displayed.

The layout of the display is pretty self-explanatory, but here is a brief is summary:

  1. The outdoor temperature and humidity values are situated on the left of the unit, while the indoor temperature and humidity values can be found on the right. This includes each one's trending and alert indicators.
  2. The weather forecast icons take center stage and are placed in the upper-middle part of the screen.
  3. The time and date settings occupy the bottom-middle part of the screen.

All these elements combined, result in a well laid-out and easy to read display console with a premium feel. 

Outdoor Sensor

Outdoor Sensor

The outdoor sensor comes in the shape of a plain white rectangular container, with no standout features. A battery compartment housing 2 AA batteries, as well as a red LED light can be found on the front of the sensor.

The plastic feels relatively sturdy and will definitely be able to withstand a knock or two. A hole in the top of the unit and the flat surface on the back of the sensor gives you a variety of options to hang or mount it against a wall or other vertical surfaces.   

Setup Guide And AC Adapter

Here it is pretty much a case of "what you see is what you get". The AC adapter allows the display's backlight to be permanently switched on at various brightness levels.

The setup guide comes in the form of a small, folded piece of paper, printed on both sides. This already gives you a hint of the quick setup and ease of use that makes this La Crosse weather station so appealing.  

Installation And Setup

Sensor Setup

The setup guide simply recommends for the outdoor sensor to be placed in a shaded outdoor location. I think a little more information can be helpful here, especially for the novice user.

Since the sensor broadcast both humidity levels and temperature to the indoor unit, care should be taken to place unit in position where it will not be influenced by artificial sources of heat and moisture.

If you are unsure, you can find all the information you need about where to place your outdoor weather sensor placement in this article.

Once you decided on the right location and method of fastening your sensor, just make sure your 2 AA batteries are correctly inserted (the red LED will flash after installation) and you're good to go.

Display Console Setup

Setting up the indoor display is surprisingly quick and easy. (Obviously, I am used to the setup of much more complex weather stations like the Ambient Weather WS-2902A Osprey and Davis Vantage Vue).

La Crosse Technologies 308-1414b Display Console

It literally takes no more than five minutes to set up the display unit. Simply hold in the "Time Set" button at the top of the unit until the time display starts to flash, and follow the setup guide to quickly set the time, date, and temperature units.

Please note, the WWVB function, which allows the clock to be kept accurate after setup, only functions in North America. If you live in another part of the world, you may want to keep this feature switched off and just set up the time manually.

Here my only criticism against the small setup guide is that not enough information is given for the correct placement of the indoor display console. Many artificial indoor sources of heat and humidity, like stoves, baths, and electronic equipment can influence your readings.

For a complete guide on how to locate the best place to put your indoor weather station, you can read it in this article.

Performance, Quality And Accuracy  

Much of the information in this section has already been mentioned elsewhere in the article, but summing up this La Crosse's weather performance and accuracy in one section will give you a better idea of how it actually performs. 

Quality

Much has already been said about the quality of the display console. It is one of the brightest and easy-to-read displays I used thus far. This does not mean it is the best display on the market, but for a budget weather station, this is exceptional.

The buttons on the console also have a sturdy look and solid feel to it. They are logically laid-out and easy to use. The kickstand for the display works well too and allows your unit to sit on a desk securely.

The only other component is the outdoor sensor. There is nothing special about it but does what it is supposed to do. It looks and feels solid enough to handle some rough treatment, and the design makes it easy to be mounted in almost any vertical position.

Performance And Accuracy

Even though the La Crosse 308-1414B only measures temperature and humidity, it seems to be more than accurate enough, especially for the beginner weather enthusiast.

Only time will be able test these initial impressions, but one way of quickly establishing relative accuracy is by putting the indoor display console and outdoor sensor next to each other and observe how much they correlate or differ.

La Crosse Performance

I was very surprised to find that the two units managed to measure exactly the same temperature. (See accompanying picture.) It's not a perfect test or proof, but definitely looks very promising. 

The strength and speed of the signal between the outdoor sensor and the indoor unit are also impressed. Not only was the sensor signal picked up by the indoor unit in seconds, but it also managed to keep this connection through several concrete walls.

Does this mean that this is the perfect budget weather station on the market? Not at all!

Anyone who has read the majority of articles on this website will know I consider three variables crucial to make a proper prediction or forecast of future weather conditions:

  1. Temperature
  2. Humidity
  3. Barometric Pressure

Clearly, the La Crosse 308-1414B do not have a barometer, which really would have made this the perfect budget weather station for me.

The other "shortcoming" is the absence of WiFi connectivity, which makes the logging and storing and weather of conditions impossible.

But taking into consideration the low price and quality of the weather station, it really can't be faulted as a beginner station. Too many sensors and WiFi connectivity may be a bit overwhelming for the beginner weather enthusiast.

To help you get a quick overview of the advantages and disadvantages of the 308-1414B, you can take a look at the comparison chart below.

ADVANTAGES

Quality Design & Construction

Ease Of Use

Clear And Well Laid-Out Display

Accurate Readings And Measurement

Atomic Clock For Accurate Time Keeping 

Ideal For The Beginner

DISADVANTAGES

Too Basic For The Advanced User

Absence Of A Barometer

No WiFi Connectivity


Get more information and pricing on the La Crosse 308-1414B by following this link.

Conclusion

To be honest, what an unexpected surprise this budget weather station turned out to be. I was only looking for a little backup weather station to monitor the basic weather conditions without leaving my study/studio.

I already provided more than enough evidence of why I am so impressed with the La Crosse. I also highlighted some features I missed on this device that would have been nice additions, but not crucial for an entry-level system.

So, the question remains, will I recommend this weather station. If you are an intermediate or experienced weather enthusiast, then definitely no. There are just too many features missing that you as an advanced will need to study all aspects of the weather in your area. 

But maybe you are just a casual weather observer that's just interested in basic weather conditions, or a novice weather enthusiast who wants to get your feet wet first, and have the resources to upgrade to something more advanced later. 

In the latter case, absolutely yes! I am very sure you will never be sorry for choosing the La Crosse 308-1414B as your starter or secondary weather station!

​​​​Feel free to leave me any comments, questions or suggestions, and I will get back to you as soon as possible.

Remember to join my  Mailing List  to be informed whenever a new article is released, and share new developments and helpful hints & tips.

Until next time, keep your eye on the weather!

Wessel


15 Weather Gadgets And Tools To Enhance Your Weather Experience And Brighten Up Your Study Or Room

15 Weather Gadgets For You To Enjoy Review heading

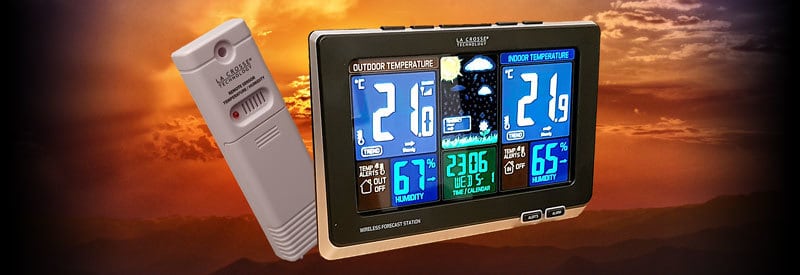
Yes, you take your passion for all things weather very seriously. But sometimes you are looking for something weather related you just enjoy using, love looking at, or just need to enhance the look of your study, bedroom or lounge.

Well, that is exactly what this post is all about. We are having a look at just about everything weather related. From a "simple map" to a comprehensive weather station setup (and everything in between), I included a bit of everything.

As a result, I put together a collection of 15 weather related items, simple and complex, cheap and expensive, as well as fragile and robust. Somewhere in this mixed bunch I am sure you will find something you didn't even know even existed. (I know I didn't.)

Enjoy browsing through this interesting list...

1) Del Milan 3 in 1 Classic Weather Station

Del Milan 3 in 1 Weather Station

If like me, you enjoy the classic and timeless look of "old" weather meters used during the early years of home weather monitoring, you will really find the Del Milan Weather Station irresistible.

Perfect to be hanged in you study, studio, or in any space for that matter will definitely add a touch of class to the room. But if you think it's just a beautiful ornament to brighten up your living space, you are sorely mistaken...

This is a fully functioning weather station. It features a barometer, thermometer and hygrometer for measuring air pressure, temperature and humidity respectively.

With a very solid built quality and classy finish in teak wood, this is one addition to your weather collection that will never go out of fashion.  

Get more information and pricing on the Del Milan 3 in 1 Classic Weather Station here.

2) ThermoPro TP55 Indoor Thermometer

When you're a desktop computer enthusiast, there is no such thing as having enough memory. If you're a fashion conscious model, you can never enough shoes. Similarly, for some weather enthusiasts, they can have never have enough weather stations.

I know, I am just generalising here. Besides, it is a bit impractical to have weather station in every room. (Not to mention the unnecessary amount of cables, radio signals, and having to make sense of all the data you receive from each device.)

ThermoPro TP55 Digital Hygrometer Indoor Thermometer

Still, even if you only have one primary weather station you use to gather and process all your weather data, it's always nice to have something nearby to display your immediate surroundings' atmospheric conditions.

The little ThermoPro TP55 Indoor Thermometer does that. This inexpensive and compact weather station can sit comfortably in the corner of your desk.

With an easy-to-read and informative display, it keeps you updated at all times of all the important weather conditions by just quickly glancing at it.

If you want to find out more about this handy little indoor weather station, I cover it in more detail in this post. 

3) Meteorology Manual: The Practical Guide to the Weather

As much of we would like to think so, even the most experienced "weather expert" among us don't know everything. If you are a newbie in the world of weather, this handy book will be invaluable to help you learn all the workings of the weather and all its variables.

It covers all the major weather systems, terminologies and how everything is working with, or against each other.  

Meteorology Manual: The Practical Guide to the Weather

It is also packed with illustrations to make everything easy to understand. Each of the 174 pages are filled with valuable information.

It is not the "Ultimate Guide", covering every single detail of the weather and all its workings in the finest detail by any means.

Still, it is quite a comprehensive guide to our weather and climate, from explaining something as simple as simple as barometric pressure, to describing the Coriolis Effect and its circulation around the world.

Don't be fooled into thinking this book is just for beginners though. It serves as a handy reference guide for any weather enthusiast to keep nearby to look up some forgotten term, or explain a certain cloud system you haven't seen before.

Get more information and pricing on the Meteorology Manual here.

4) Ambient Weather WS-208T 9" Brushed Aluminum Thermometer

Why?

Well, to be honest... Because it just looks so classy and beautiful. Yes, it may be a personal and a biased opinion. but I am sure many of you will agree that this 9 inch thermometer with its metallic bezel and radiant blue background, really is an eye-catching instrument. 

Ambient Weather WS-208T 9 Inch Brushed Aluminum Contemporary Thermometer

And far from just being ornamental, the WS-208T is a fully functional thermometer. After all, this simple thermometer is made by the same company known for their accurate and highly regarded basic & advanced electronic weather stations. 

Off-course you can get a multifunction weather meter for the same price (or just as accurate a thermometer as the WS-208T ten times smaller if you like), but that is hardly the point of this thermometer.

If you want something to brighten up and add some class to your surroundings, the WS-208T may just be the perfect addition to your study or den.  

Get more information and pricing on the Ambient Weather WS-208T 9" Thermometer here.

5) AcuRite 00795A2 Galileo Thermometer with Glass Globe Barometer

Similarly to the Ambient WS-208T discussed in the previous section, the AcuRite Galileo Thermometer serves a dual purpose, also with emphasis on the ornamental side. 

AcuRite 00795A2 Galileo Thermometer with Glass Globe Barometer

As the name suggests, this thermometer-barometer combination is based on the principles and techniques used by Galileo Galilei, the famous Italian inventor, astronomer and physicist who revolutionized the way we look at astronomy & science in the 1600's

If you are a fan of this visionary man, often called the "father of observational astronomy" and the "father of modern science", then you will love this weather device.

The thermometer comes in a cylindrical shape, while the barometer is shaped like a globe with a map of the world etched into the glass service.

The thermometer is filled with colorful liquid-filled spheres that ascend and descends, depending on the types of changes in atmospheric conditions.  The barometer is filled with a blue liquid (also called a storm glass, or Goethe barometer), that changes in height to correspond with changes in barometric pressure.

Mounted on a wooden stand, this thermometer-barometer device will liven up your desk space, without taking up unnecessary space. (An is surprisingly accurate as well!)

Get more information and pricing on the AcuRite 00795A2 Galileo here.

6) La Crosse Technology WT-3161WH 16 Inch Stainless Steel Atomic Clock

Many of us are very finicky about time. Being on time has become an obsession for many individuals and companies. So much so, that people's character are being judged to a large extend by their ability to keep time.

Well, if you are willing to settle for a clock that lose a second every 138 million years, the La Crosse WT-3161WH will be good enough to satisfy your needs.

La Crosse Technology WT-3161WH 16 Inch Stainless Steel Atomic Clock

As the name suggests, it is an atomic clock, the most accurate type of clock in the world, which keeps time so accurately, that it is measured to loose only one second every 138 million years, as already mentioned.

It still use the "old" quartz technology now standard in millions of watches. It is kept accurate though, by running an electrical current through an atom (normally caesium-133), and use its oscillations to adjust and keep the clock accurate.  

Being an atomic clock, the La Crosse clock will automatically keep accurate time and automatically correct any deviation from the correct time.

So, if you are looking for a good-looking wall clock that you can put up and literally forget about, knowing it will always show you the correct time, then look no further than the Crosse WT-3161WH atomic clock. 

Get more information and pricing on the La Crosse Technology WT-3161WH Atomic Clock here.

7) Climate Change: What Everyone Needs to Know

I know I am venturing into dangerous territory by just mentioning the subject, as this a very controversial subject, with some of the most extreme opposite views I ever encountered.

But, having said that, if people are looking for a reason to criticize and attack you, they will find one. No matter how carefully you tread.

Climate Change: What Everyone Needs to Know

I believe if you really want to be a true and unbiased weather enthusiast, you would want to arm yourself with as much accurate information as possible. 

When it comes to client change, I believe this book will give you the most unbiased and factual information about this very real growing global problem. 

Well, if you are willing to take the red pill and see how deep the red rabbit hole really goes, I can recommend you take a serious look at this informative and sobering book.

Get more information and pricing on "Climate Change: What Everyone Needs to Know" here.

8) Kestrel 5500 Pocket Weather Meter

If you're the guy or girl who love hiking and camping or just being out in nature for love periods of time, you will absolutely fall in love with this tool.

Kestrel 5500 Pocket Weather Meter

What you get, is literally a complete weather station that can fit into you pocket. 14 Atmospheric variables can be measured, including temperature, humidity, wind speed & direction, as well as barometric pressure.

Additional features like a digital compass and altimeter meter makes this a very useful tool for those of you planning on taking a trip into the unknown.

Needless to say, since this device is meant to be used in challenging conditions, it is both shockproof (MIL-STD-810G) and waterproof (IP67).

The impeller (for wind speed) is one part of the device that can be prone to damage, but a cover that can quickly slide out and back in place, provides ample protection.

A backlit display makes using the Kestrel easy in low-light conditions. Despite all these functions, the Kestrel 5500 is powered by a single AA battery. With a superior lithium battery, this pocket-sized device can run for up to 400 hours.

I can go on and on about this fascinating "Leatherman" of compact weather devices, but you get the general idea.

Get more information and pricing on the Kestrel 5500 Pocket Weather Meter here.

9) Advantus 12 Inch Desktop World Globe

You can literally find a map of the world online by just a few clicks of a button. The smallest and least known town anywhere in the world is now ridiculously easy to find.

Yet, when weather systems or specific wind patterns in certain parts of the world are discussed, it feels a little abstract to us and we sometimes get a sense of being disconnected.

It's simply because looking at a map on a screen or piece of paper, doesn't really help you to get a proper idea and feeling of where in the world a weather event is taking place and its context on the larger global scale.

Advantus 12 Inch Desktop World Globe

Having an actual physical representation of the world in the form of an accurate rotating globe, helps you to form a much clearer idea of exactly where a weather event is taking place, and everything just starts to make a little more sense and becomes that much more real to you.

This is exactly what the Advantus 12 Inch Desktop World Globe does for you. Quickly finding a location on the globe, and then rotating and tilting it in specific directions to follow a weather event or movement, will sometimes explain a specific topic or principle in better detail than any amount of words ever can.

The 12 inch map shows you all the countries in the word, including all major regions and major cities. With the equator clearly indicated, raised relief (for accurately depiction mountainous and other raised terrain), and including latitude and longitude indicators,  make the experience that much enjoyable and easy for you to use.

At 12 inches in diameter, it is big enough without taking up too much space. Sturdily build and standing on a solid base, this globe will also last you a lifetime.

I honestly cannot imagine any true geography or weather enthu this siast without the assistance of globe in their office or study to help then orientate themselves every once in a while. (And yes, it adds to the look and feel of your environment as well.)  

Get more information and pricing on the Advantus 12 Inch Desktop World Globe here.

10) Del Milan Banjo Barometer, Thermometer, Hygrometer, Carbon Fiber Finish

Del Milan Banjo Barometer,-Thermometer,-Hygrometer, Carbon Fibre -Finish

Very much the same as the Del Milan 3 in 1 Classic Weather Station mentioned in the beginning of this post, this classically shaped weather meter is just another take on the weather meters used during the early years of weather monitoring.

I am sure you will agree that this particular interpretation and shape, makes this weather station especially appealing. Finished in stunning carbon fibre, this instrument will stand out in any location.

As an alternative (or addition) to the first Del Milan mentioned in this post, you cannot go wrong with this classy weather station. 

Get more information and pricing on the Del Milan Banjo here.

11) Climate Maps (Map It!)

This is one for the slightly more advanced weather enthusiast. As you advance through your weather journey, learn more about all the aspects of climate and change, yo're are going to come across climate maps at some point.

Climate Maps (Map-It!)

At this stage you may or may not already know what they are, but do you know how to read and understand them?

This guide takes you through the whole process, from explaining what exactly climate maps are, to understand and correctly use them. (It even includes information on using a legend and compass rose to assist you in the process.)

Get more information and pricing on the Climate Maps (Map It!) here.

12) Ambient Weather WS-2902A Osprey Wireless Weather Station

When you start out as a beginner weather enthusiast, a small indoor weather station will be more than adequate to get your feet wet and learn the weather basics.  

As you advance and get more knowledgeable, your needs will outgrow the capabilities of your "starter" system in time.

Ambient Weather WS2902

When you start looking at something to replace your basic weather station with a more advanced one. But also one that can potentially last you for a much longer time, as your investment will be substantially bigger.

Recently I went through this process, and after some extensive research, I invested in the Ambient Weather WS-2902A Osprey Weather Station. I am happy to report that I am very satisfied with my purchase (although months after my purchase I haven't even made use of almost half the functions available on this weather station.)

It definitely is not the only worthwhile and quality advanced weather station available, but one I can wholeheartedly recommend to anyone looking for an advanced weather station.

You can view my full report on the Ambient Weather WS-2902A Weather Station here.

13) CAT S41 Rugged Waterproof Smartphone

If you plan to be a storm chaser, or just spend extended periods of time out in nature, you would want a communication device, specifically a cell phone, that will be able to withstand everything that nature can throw at it.

CAT-S41

And cell phones come no tougher than the CAT S41. This rugged smartphone was designed from the ground up survive the most severe conditions it can be subjected to. Needless to say this is not the cheapest Android phone on the market.

However, this is not the type of phone you are going to replace every 2 years, and taking all the features it packs into consideration, this makes it a very worthwhile investment. 

Some of the features include:

  • Military Standard Shock And Drop Proof Up To 1.8 meters (6 feet)
  • Battery Standby Time Of Up To 44 Hours (Talk Time Around 38 Hours)
  • Waterproof Up To 2 meters (6.5 Feet)
  • 5 Inch Full Hd Scratch Proof Gorilla Glass
  • Bright Display Can Be Read In Direct Sunlight
  • Internal Storage Upgradable To 2Tb

Obviously this phone is not for everyone, but if you are a serious outdoor enthusiast, this may be just the kind of reliability and security you are looking for.

Get more information and pricing on the CAT S41 Rugged Waterproof Smartphone here.

14) Weather Map Handbook, 3rd ed.

This guide is one for the beginner, as well as the advanced weather enthusiast or even the professional meteorologist. 

Weather Map Handbook

At some point many of us are going to have to learn to read weather maps and charts. And not just the simple ones we see on television and online weather reports. 

Detailed meteorological charts my look like a some weird kind of hieroglyphic collection. If you plan to go far in your pursuit to understand and even pursue a professional career in meteorology, you will need to read and understand these charts at some point.

I realize the vast majority of us will never reach this stage, but for those of you who are serious to learn everything there is to know about all forms of weather maps and charts, this comprehensive encyclopedia covers just about any kind of map/chart created from almost every possible source.

Get more information and pricing on the Weather Map Handbook here.

15) Kaito KA500 Emergency Weather Alert Radio

A very handy, and sometimes necessary & lifesaving piece of kit. This multi-purpose radio is built for hardcore outdoor enthusiasts, especially those who spend long periods of time in the wild, or on the water.

Kaito-KA500

Able to be operated by the 3 different power sources, it can be hand-cranked, solar powered and have a battery backup. 

You have access to FM, AM, 2 shortwave,  as well as 7 pre-programmed NOAA weather channels (for real-time forecasting in the USA and Canada).

Other accessories include a built-in flashlight, reading light, and red emergency beacon light. It even includes a USB charger for your cell phone or MP3 player.

Naturally, it is fully water-resistant and impact-resistant to deal with all the harsh outdoor conditions it might be subjected to. 

Get more information and pricing on the Kaito KA500 Emergency Weather Alert Radio here. 

Conclusion

With these 15 products, you now have a variety of choices to choose from. From a purely functional to mainly ornamental need, there is really something for everyone in here.

Some of these products can be considered necessities, while others are just optional extras, while some can be used for ornamental purposes only. All of them serves a function though, so you will be able to find a use for each of them.

Feel free to leave me any comments, questions or suggestions, and I will get back to you as soon as possible.

Remember to join my  Mailing List  to be informed whenever a new article is released, and share new developments and helpful hints & tips.

Until next time, keep your eye on the weather!

Wessel

Want To Look Like A Weather Pro? The Davis Instruments Vantage Vue Weather Station Lets You Do Just That

Davis Vantage Vue Review heading

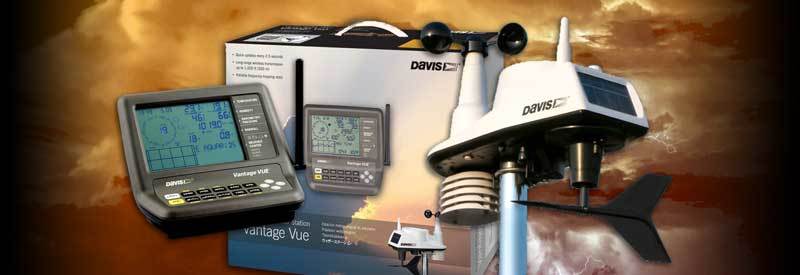
We follow this path with every hobby, sport or interest we decide to pursue. We start with the basics, and after mastering them we move on to more advanced equipment. At some point though, we have reached the point where we have become so proficient and experienced in our chosen field, that you may require nothing but the best possible equipment in your field.

At some point during the process of pursuing our hobby or passion for all things weather related, you will reach this stage. You have gone through all the beginner and advanced home weather stations, but now only the best and most accurate equipment will meet your requirements.

Enter Davis Instruments line of professional weather systems. Often called the gold standard for all weather equipment, or the "Rolls Royce of home weather stations". These accolades are well deserved.

This company has been around, providing weather enthusiasts and professionals, with accurate and reliable weather data, long before home weather stations became more common and affordable. (And with so many manufacturers & models to choose from.)

With a history dating back more than 50 years, the company has expanded since and are currently servicing various sectors and industries. Luckily this does not mean they neglected their home weather stations.

If you are looking for the best weather station money can buy, Davis Instruments is by far your best choice. When it comes to accuracy and reliability, they simply are in league of their own. With it comes the inevitable bigger price tag. (But totally justified).

Davis Instruments Vantage Vue Box

The Davis Instruments Vantage Pro2 is the flagship and best weather station in their consumer line-up. However, its smaller brother, the Davis Instruments 6250 Vantage Vue, provides you with measurements and features almost on par with Vantage Pro2 at a much more affordable price.

As the Davis Instruments Vantage Vue is the focus of this post, you can rest assured that the little you sacrifice in accuracy at this level, is really negligible.

Using my Ambient Weather WS-2902A Osprey, as well as a fellow weather enthusiast's Davis Vantage Vue as reference points, I will be looking at all the features, as well as how well it performs in order to help you to make the best possible decision. 

Installation And Setup

The Vantage Vue comes packaged in a sturdy box, with the different components securely and safely packaged in two compartments. Just by the feel and look of packaging, you already get a feeling of quality and attention to detail.

The wind vane and anemometer are packaged in the top compartment with the rest of the assembly accessible in the compartment below it.

The plastics have a high-quality look and feel to them, and the included Allen Key helps securely attaching all the components to the sensor assembly a breeze.

Vantage Vue Assembly

As you can see in the picture above, basically all the components and necessary tools to assemble them, are easy to recognise and simple to assemble. A comprehensive user guide is included to help you assemble the outdoor sensor assembly quickly and pain free.  

Also included is a set of brackets and bolts to attach your assembly to a 1 - 1.75 inch pole. You will need a 7/16 inch wrench for fixing the assembly to the pole, but this is almost the only additional tool you need for the sensor assembly. (Obviously you are responsible for where and how you will install your pole.)

Follow the rest of the steps laid out in the manual, but make sure your sensor array is pointing in the right direction, depending on which hemisphere you find yourself in. (The solar panel should face south in the Northern Hemisphere, and north in the Southern Hemisphere.) Your wind sensor is calibrated for a southward facing panel, so make sure you make the necessary adjustment on your console if you live in the Southern Hemisphere.

Setting up your inside display console takes a bit longer. After installing the batteries and AC power adapter, you will hear 3 consecutive beeps, telling you the unit is switched on and ready to be set up.

Once again, the instruction manual makes the setup process easy for you by taking you through the whole procedure step-by-step. Make sure you follow all the steps, as this will make sure your weather station function correctly and accurately.

Take specific care to correctly set up your longitude and latitude location, height above sea level, as well as the month the rainy season in your region normally starts. Do this correctly and you will ensure your weather station functions correctly for your location.

Follow the other steps in the setup as well. After you finished setting up your console, simple press and hold the "Done" button, and that's it. Your basic setup is done.

For an advanced weather station, this a very straight-forward and hassle-free setup. (I would judge the setup time and complexity to be no longer than that of my Ambient Weather WS-2902A Osprey.)

You can find additional information and pricing on the Davis Instruments 6250 Vantage Vue here.

Performance, Quality And Accuracy

The Sensor Array

After correctly installing and setting up both your sensor array and display console, you should start receiving data within a minute. I recommend leaving it for a couple of days to "settle in" while observing the measurements to get a feel for all the data and where it is displayed on your console.

Before getting into specific detail, there is one conclusion made by many other Vantage Vue owners, which I can very definitively confirm: The Davis Instruments 6250 Vantage Vue is one very serious high-end weather station. You are going to have to look very long and hard to find a more accurate and reliable system at this price point.

Vantage Vue Sensor Array

It comes with a comprehensive set of outdoor sensors, all of which are displayed and frequently updated on the display console. Compared to other weather stations that get sensor updates with intervals of between 15 seconds to a minute on average (depending on your weather device), the Vantage Vue sensor array sends sensor updates with intervals as short as 2.5 seconds (depending on the sensor), making it lightning quick and easy to monitor measurements in "real time".  

Apart from the accurate measurements and very frequent sensor data updates, another standout feature, is the maximum wireless distance capability of the Vantage Vue. The sensor array and display console can be set up to 1000 feet (300 meters) apart. This is really impressive indeed, especially if you take into consideration most wireless weather station have a maximum range of around 300 feet (91 meters).

The 5-in-1 outdoor sensor array covers all the important weather variables that are necessary for accurate and comprehensive measurement and forecasting. (Yes, you get weather stations with more sensors included, which are often heavily promoted. These are optional sensors however that won't really add any substantial value to your ability to accurately monitor and forecast the weather conditions.)  

Here is a summary of the features and advantages of the sensor array:

  • Quick & Easy Installation
  • Temperature Measurement 
  • Barometric Pressure Measurement
  • Rainfall Measurement
  • Wind Speed Measurement
  • Wind Direction Measurement
  • Transmitting Distance Of Up To 1000 feet (300 meters)
  • Highly Accurate Measurements
  • High-Quality And Durable Built
  • Solar Powered
  • Very Short Intervals Between Sending Of Data (Depending On Sensor)

Here is a summary of some of the disadvantages of the sensor array:

  • Sensors Cannot Be Placed Individually (All Forms Part Of One Unit)
  • Perceived Lack Of Full Sensor Array (Some Cheaper Stations offer More Sensors) 
  • Inability To Add Additional Sensors

The Display Console

The display console draws a mixed reaction. First of all, it is a rugged and well-constructed unit that looks and feels like it can withstand some rough treatment.

The LCD mono screen is clear with a backlit display and "glow-in-the-dark" buttons to help you operate the unit during low-light conditions.

Davis Vantage Vue Display Console

The data is also displayed in a logical fashion, and serious weather enthusiasts will have no problem quickly glancing at the display and get all the information they are looking for.

Essentially all the weather data measured is displayed simultaneously on the unit, so you can find all the important weather information you are looking for without having to go through extra menus or pressing any additional buttons.

A graph showing weather trends for different variables (like temperature, rainfall and barometric) are also displayed at the bottom of the screen. This graph is programmable, so you can set the variable which trend you want to follow.    

But its not all good news...

As well-build and logically laid-out as the display is, it has a very dated looking display.

The Display Console looks very outdated. This is especially evident when unboxing the weather station and viewing it next to the much more modern looking sensor array. Viewing it alongside display consoles of weather stations more than half its price make this outdated look even more obvious.

I may be a bit critical here, but for a high-end weather station at this price point, you really deserve much better, 

A HD colour display really would have made the world of difference without adding to the cost of the station. Using colour will also help to highlight and distinguish between the many different variables on the display much more clearly. Which brings me to the second drawback of the display.

As already mentioned, the display console shows almost all the data it measures on the screen. Although logically laid-out, the sheer amount of information can be overwhelming for the new user, or inhibiting if you quickly want to vue a particular piece of data.

A colour display will go a long way towards improving the readability of the display and make the display as a whole look much more organized. The cost of high-quality HD displays have dropped dramatically in price over recent years, so this really should not have an impact on a premium weather station in this price bracket.

I did some research, and it has been pointed out that this display console was designed more than 20 years ago. I have no evidence to back up this claim, but judging from the looks of the display, this claim may not be far off. "Come on Davis Instruments, give us a display worthy of the quality and high standard of the rest of your weather station."

Here is a summary of the features and advantages of the sensor array:

  • Solid Build Quality
  • Clear Display With Logically Laid-Out Buttons For Quick & Easy Access
  • Backlit Screen and "Glow-In-The-Dark" Buttons For Low Light Operation 
  • Temperature Display (Inside & Outside)
  • Barometric Pressure Display (Inside & Outside)
  • Rainfall Measurement Display (Outside)
  • Wind Speed Display (Inside & Outside)
  • Wind Direction Indicator (Inside & Outside)
  • Humidity Display (Inside & Outside)
  • Weather Trend Graphic Display
  • AC Adapter
  • Battery Backup
  • Forecasting Icons (For Changes in Weather Conditions Over The Next 12 Hours)
  • Date & Time Display
  • Multiple Alarms For Various Weather Events
  • Included Kickstand Or Foldout Legs
  • Sunrise & Sunset Display
  • Moon Phase Display
  • Ability To Change Between Empirical And Metric Display 

Here is a summary of some of the disadvantages of the sensor array:

  • Visibly Outdated Display
  • No Built-In Internet Connectivity
  • WiFi Not Standard

Wireless Connection Setup (Optional)

Unfortunately, this is the one area where the Vantage Vue falls short. In an era where internet connectivity is a given on all modern electronic devices, the fact that this feature doesn't come standard on this premium weather station is quite disappointing.

WeatherlinIP

You can connect the Vantage Vue to the Internet, including its own app and website or a third party service like Weather Underground. You need to purchase the WeatherlinkIP Data Logger however, a seperate and rather costly piece of hardware in order to do so.

This criticism is not aimed to put you off from what is otherwise a top-of-the-line device that is in a league of its own in almost every other way. It is just an important fact you should be aware of before you make any kind of decision.

This will also help to bypass the shortcomings of the display, by viewing all your data in detail and in real-time on your laptop or mobile device.

You can find additional information and pricing on the Davis Instruments 6250 Vantage Vue here. 

Conclusion

So, this leaves you with probably the most important question. Is the Davis Instruments 6250 Vantage Vue worth the high price tag?

In a nutshell the answer is yes, without a doubt. Its unparalleled accuracy when it comes to data measuring and forecasting, as well as build-quality and reliability, makes it more than worth the prize.

Yes, the outdated display console and lack of built-in internet connectivity are drawbacks, but not enough to disqualify it as the best choice for a premium weather station.

(In all fairness, there are ways of working around the problem. Yes, it will cost you more and take more time to set up. However, if you are serious and passionate enough to consider a home weather station in this class, going the extra mile will not be too much of an issue)

For more information and pricing on the Davis Instruments 6250 Vantage Vue, simply follow this link.

Feel free to leave me any comments, questions or suggestions, and I will get back to you as soon as possible.

Remember to join my  Mailing List  to be informed whenever a new article is released, and share new developments and helpful hints & tips.

Until next time, keep your eye on the weather!

Wessel


Start Your Weather Journey With These Three Indoor Home Weather Stations Under $50

3 Indoor Weather Stations Review heading

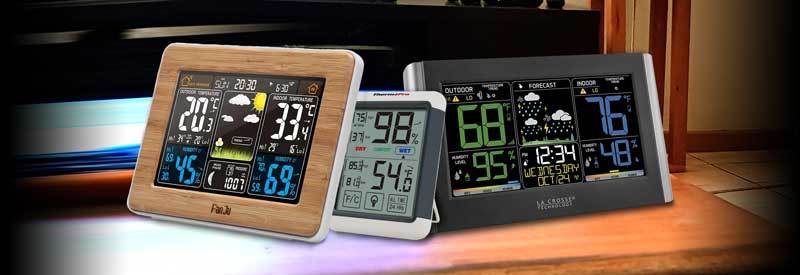
I get it, believe me. You get interested in a subject like the weather and want to get your feet wet, but all you can find are reviews and tests of "the best" or "the most popular" products in the field. And all you wanted was something simple to get your feet wet and get some experience. 

Been there, got the t-shirt. (Probably one of a few reasons it took me so long to really get hooked or enthusiastic about any specific interest or hobby.)

If you find yourself in this position when it comes to all things weather-related, you may have just stumbled across the right article for you.

If you read any of my other articles or pages, you will know that I am quite passionate about the weather and would love for everyone else to get interested and involved with it as well.

This is one of the main reasons I put this article together. With a budget of $50 or below, I had a look at three weather stations that do not have countless measurements and readings, or an array of outside sensors.

What they do have, however, is the ability to provide you with simple and straight-forward measurements and displays. Just enough to keep you easily informed, let you compare your readings with the actual weather you are experiencing, and in the process hopefully grow your knowledge and interest in this surprisingly fascinating world of weather. 

Let's take a look at my pick of the three indoor weather stations one at a time.

ThermoPro TP55 Indoor Thermometer

The first thing that jumps out after unpacking and starting up this weather station, is the large and easy-to-read display. It may come with a small price-tag, but definitely makes sure you take notice of it.

ThermoPro TP55 Digital Hygrometer Indoor Thermometer

And that is one thing I immediately liked about this "budget" weather station. Especially when you start out with your first weather station, you don't want to be confused a by a barrage of meter readings fighting for your attention.

The ThermoPro TP55 keeps things very simple. Although many criticize it for not being able to show you the time, the two most important measurements are prominently displayed. Those two measurements are humidity and temperature.

(Honestly, with everything from your cell phone to your microwave telling you the time, do you really need another device telling you the time?)

Smaller readings like minimum/maximum readings and the ability to change between units (Fahrenheit/Celsius) is very handy and easy to access.

The 4 inch touchscreen display has a pleasant blue backlight that lights up for 15 seconds with a simple touch of a finger. (Very handy when on your bed stand and you want to take quick reading in low lighting conditions.)  

It also has a foldout stand at the back to place on any flat surface, or you can use the magnet to place it against any metal surface. It is these small attention to detail that I found very handy and practical.  

The only thing I would have liked to see added is a barometric (air) pressure reading. On a starter weather station, this is really not necessary though.

Here is a brief summary of some of the benefits:

  • Very affordable
  • Large and easy-to-read display
  • Simple and easy to use
  • Quality build and feel
  • Fairly accurate humidity and temperature measurements
  • Humidity and temperature trend indicators

Here is a brief summary of a few drawbacks:

  • No AC adapter
  • No barometric (air) pressure measurement and reading
  • No custom measurement calibration

As you can see, I find it hard to fault this little indoor weather station, especially for the price. Yes, it may lack a few features, but I find it really unnecessary for anyone who just want a simple system to start with.

You can find more information and pricing on the ThermoPro TP55 Digital Hygrometer Indoor Thermometer here.

FanJu FJ3365W Wireless Weather Station

If you are looking for something unique that will immediately grabs someone's attention, look no further than the FJ3365W. From the moment you lay your eyes on it, you will see what I am referring to.

It's not often that you find a weather station housed in an attractive wood textured casing. (Yes, it also comes in black and grey, but the wood textured casing is by far the most popular choice and the one I opted for as well).

FanJu FJ3365W Wireless Weather Station

The display is also bright and easy to read, although like many other weather stations, its viewing angle is limited. The wider your viewing angle the more difficult it will become to read the display.

(Luckily most of the time when you want to have a good look at the readings, you will be standing or sitting right in front of the device. I certainly did not find it to be a problem at all.)

But obviously looks aren't everything, so let's concentrate on the device's features. Unlike the ThermoPro TP55, the FanJu FJ3365W comes standard with the added benefit of an external sensor unit. Although not a requirement for the purpose of this article, it definitely does have its benefits.

Like the ThermoPro, it comes with temperature and humidity settings. What set it aparts however, is the fact that it shows outdoor humidity & temperature readings on the left, and indoor humidity & temperature readings on the right of the device.

It also includes additional functions like displaying the moon phase, date and time.  The fact that it also comes with a daily alarm and snooze function, makes it ideal to be used as an alarm clock on your bed stand. (Yes, it can be very bright in the dark, but you have 5 backlight settings to choose from to adjust the display to your level of comfort. The display can even be switched off completely.)

Another welcome feature is the inclusion of a barometric pressure reading. As already mentioned, I find this feature unnecessary for a beginner weather station. Having said that, it is welcome addition and will help you to better understand the weather.

One last feature that needs to be highlighted is the FanJu's forecasting ability through icons displayed in the centre of the display. (And the forecasting is surprisingly accurate for a device in this price bracket.)

I feel obliged to mention that while researching this weather station, I came across some reviews where users experienced some device failures after their purchase. In most cases though, they were resolved quickly by the supplier and I haven't experienced any of these problems myself.

Here is a brief summary of some of the benefits:

  • Attractive design and housing
  • Bright and logically laid-out display 
  • Outdoor sensor adds additional functionality to the weather station
  • Build-in date, time and alarm
  • Moon phase indicator
  • Barometric (air) pressure measurement and reading
  • Both outdoor and indoor humidity & temperature displayed
  • Weather forecasting function
  • AC Adapter 

Here is a brief summary of some drawbacks:

  • Limited viewing angle
  • Instruction manual not very clear
  • Reported potential reliability issues (not personally experienced)

Like I said, the FanJu is quite the attention grabber, but luckily there is much more to it than just good looks. The  feature set and ease-of-use make it  a very attractive proposition as a starter indoor weather station.

You can find more information and pricing on the FanJu FJ3365W Weather Station here.

La Crosse Technology C85845 Color Wireless Forecast Station

To use a cliche, I saved the best for last. (And yes, it is also the most expensive of the 3 weather stations, but still real bargain for what it has to offer.)

As far as functions and appearance go, the La Crosse very closely mimics the FanJu FJ3365W weather station. It offers the majority features that the Fanju device offer, and even the display have a very similar layout. 

(Like the FanJu, the outdoor humidity & temperature readings can be find on the left, while the indoor humidity & temperature readings are displayed on the right. The forecast outlook, date and time are displayed in the centre of the display.) 

La Crosse Technology C85845

This is where the similarities end however. These two weather stations are two completely different beasts. It is hard to explain from just looking at photos, but in the flesh you can clearly see and feel the difference.

First of all, the La Crosse weather station is a bigger device. (At 9 x 5.4 inches in width and height, it is actually the biggest of all three weather stations.) It also has a solid look and feel to it, giving the impression of high-quality device.  

These impressions are reinforced by the more accurate readings I managed to get from La Crosse, compared to the readings observed from the other two weather stations. (My Ambient Weather WS-2902A Osprey weather station, as well as local professional weather services were used as reference sources.)

Please note, these observations are not meant to put the FanJu FJ3365W and ThermoPro TP55 in a negative light at all. They are both great beginner stations that will provide any prospective weather enthusiast with months or years of weather observation enjoyment.

For a slightly higher price tag though, you get a higher quality product with more accurate weather measurement capabilities. (These differences can be seen as negligible and the margins aren't that big.) You can decide for yourself if you prefer a more budget friendly, or slightly higher quality product.

Some advanced features include an atomic clock and self-calibrating functionality features. It also includes comfort level indicators which use the temperature and humidity settings to give users a more practical reflection of how weather conditions will be perceived.

I can only really point to one feature I found lacking on the the La Crosse, and that is the absence of any barometric pressure display. I know I said that this is a feature I don't consider necessary for a beginner weather station, and I definitely don't consider it a deal breaker. (Still, it would have been a very welcome addition to a weather station considered to be the most advanced of the three devices discussed in this article.)

With that said, let's take a quick look at some of the specific advantages and disadvantages of La Crosse Technology C85845 Color Wireless Forecast Station.   

Here is a brief summary of some of the benefits:

  • High-quality design and housing
  • Bright and logically laid-out display 
  • Outdoor sensor with accurate measurements
  • Build-in date, time and alarm
  • Adjustable brightness settings for display
  • Weather trend indicators (for both temperature and humidity)
  • Both outdoor and indoor humidity & temperature displayed
  • Accurate weather forecasting function
  • Atomic clock
  • Self calibration functionality
  • AC Adapter 

Here is a brief summary of some drawbacks:

  • Reported limited viewing angle (not personally experienced)
  • No barometric (air) pressure reading

The La Crosse Technology C85845 can be viewed as a device serving a dual purpose. On the one hand, it can be seen as a very well equipped beginner weather station. With it's more advanced functions and accurate weather measurements, it can also be seen as a budget entry into the field of more advanced home weather stations.  

You can find more information and pricing on the La Crosse Technology C85845 Color Wireless Forecast Station here.

Conclusion

You just got a quick overview of three very capable entry-level indoor weather stations that will be ideal for starting out when you venture into the world of all things weather related.

Whether you choose the simplicity and large display of the affordable ThermoPro TP55 Indoor Thermometer, or the more advanced and slightly more expensive La Crosse Technology C85845, you really can't go wrong.

(If you are looking for a more advanced weather station that will serve you well for years to come and have the budget, take a look at my article on my Ambient Weather WS-2902A Osprey Weather Station. Yes I am biased, but I am one very happy owner. If you are interested, you can read the article here.)

Whichever you choose (if you decide on picking any of these indoor weather stations), I just hope I managed to spark enough curiosity to take the first step in what will hopefully be a long interest and passion for the weather and climate. 

If I managed to achieve that, then mission accomplished.

Feel free to leave me any comments, questions or suggestions, and I will get back to you as soon as possible.

Remember to join my  Mailing List  to be informed whenever a new article is released, and share new developments and helpful hints & tips.

Until next time, keep your eye on the weather!

Wessel


Installation And First Impressions Of The Ambient Weather WS-2902A Osprey Weather Station

Ambient Weather WS2902 Review Heading

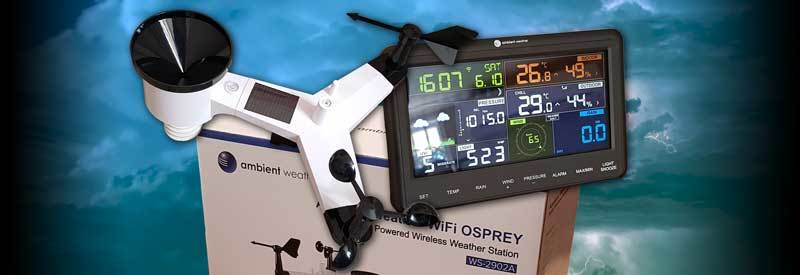
With years of experience with different personal weather stations, it was time to do another upgrade to an advanced home weather station with more advanced sensors and the latest technologies needed to stay connected and updated.

I needed to upgrade to a modern weather station that had all the sensors needed to make more accurate and consistent measurements and predictions. There are many good options out there, so a lot of research had to be done.

I thoroughly researched all options, and there are very good home weather stations available. Some which look great and has impressive displays and sensor assemblies. Some came highly recommended as very professional with a price tag to match.

Ambient Weather WS2902 Box

I needed something that is advanced, reliable and accurate. Those were my three biggest requirements. One name kept popping up, the Ambient Weather WS-2902A Osprey. After some further research, I finally took the plunge and am now the proud owner of the very same personal weather station.

I am glad to report that this decision has been a good one. (Yes, I made some bad ones in the past.) In this article, I am taking you through the installation process and my impressions of the Ambient Weather WS-2902A Osprey.

Installation And Setup

Packaging

For me, the first real indication of a quality product, is the the way it is packaged. The WS-2902A Osprey  didn't just come in a sturdy box, but ( I guess for transport purposes) packaged within an even bigger box with bubble wrap to give it extra protection.)

Ambient Weather WS2902 Packaging

The different components were securely wrapped, each one in its own compartment. Unpacking and unwrapping took quite some time, but that just goes to show how well protected and insulated every last piece of the weather station came packaged right from the start. This really instilled a sense of confidence and reassurance in my choice of purchase.

Components And Assembly

About five or six different components came packaged separately, which had to be attached to the main sensor array. This was a quick and easy process though, not even taking 15 minutes. (A rather hefty manual with a quick-start guide was at hand with step-by-step instructions which made it easy for even the least technically inclined among us.)

The whole assembly feels very sturdy, with the plastics having a high quality feel to them. Just needing a small Philips screwdriver to fasten the different components, the wind vane,   anemometer and funnel for the rain gauge, were quickly attached securely attached.

All that remained was for two AA batteries to be installed and the protective seal of the solar panel to be removed and the the sensor array was ready to be mounted. After battery installation, the red transmitter light lid up and then started flickering intermittently to indicate that the sensor array is broadcasting. 

The Ambient system comes with a bracket set (complete with a little spanner to fasten the sensor array) with a back-plate that can be fastened to a 1-2 inch pole. The pole doesn't come standard but can be purchased from Ambient Weather or even better, from any hardware store in your area at a fraction of the cost.

Ambient Weather WS2902 Assembly

Ambient Weather WS2902 Assembly

Care should be taken as to where to install your sensor array for the most accurate measurement. The included instruction guide helps you out with determining the best position, but I dedicated a whole article to optimal sensor placement which you can find here.

Just a quick note on positioning. The instructions are not very clear on this, but make sure your sensor array is pointing in the right direction when fastening it in position. The arm with the rain gauge attached to it, had a little arrow that points to the north. 

(If your assembly is pointing in the wrong direction, the wind direction will not be correctly indicated on your display and connected applications, an may even influence forecasts and other calculations.)

You can use a compass, the digital compass on your cell phone or even Google Maps to determine where north is in your area. 

And that's it. Your sensor assembly is now installed & mounted, and ready to be connected. 

Display Console Setup

Setting up your display console is just as easy and intuitive, and again your installation guide takes you through the process step-by-step. (Initial setup took me about 15 minutes maximum.)The display console feels solid with all the onscreen readings and icons logically laid out.

Make sure to insert the three AAA batteries, as well as connecting the AC Adapter to a power outlet to make sure the unit remains operational at all time and the display stays on. (The batteries will make sure the unit stays operational during a power failure, but the the AC Adapter needs to be connected for the screen to remain permanently on.)

Ambient Weather WS2902 Display Console Assembly

After removing the protective screen cover and deciding whether you are going to use the fold-out legs at the back of the unit or the included base stand to make the console stand upright, your console is ready to be set up.

It is important that you follow ALL the steps in the setup process, especially when it comes to time, date, location (timezone and hemisphere) and initial barometric pressure settings. This will ensure you get accurate readings, as well as relevant and correct calculations and forecasts for your location.

The WS-2902A Osprey is designed to be used anywhere in the world, and during setup you are able to customize the console to display all data in the unit of your choice, depending where in the world you live.

Whether you live in an area still using the Empirical System (feet, inches, mph), or the metric system (millimeters, meters, km/h), you can set up the console to display all data collected in the units appropriate for your region.

And with the display console all set up, your initial installation is all done.

(Just remember to hold the console relatively close to the sensor array location, about 5-10 feet, while setting up to allow the two units to synchronise. After synchronization, you can move the console to its permanent position.) 

If you are unsure about where to place your display console, I dedicated a whole article about the indoor placement of your weather station which you can read in this article. 

Wireless Connection Setup

The Importance Of Connecting Your Weather Station

Setting up your wireless connection and connecting to your online portal is arguably the biggest appeal and the most important part of setting up the Ambient Weather WS-2902A Osprey. For me, this is where the real magic happens. But why?

Being able to connect to Ambient Weather's own network or joining Weather Underground does much more than just allow you to mirror and show all the display console's data. The additional tools provided by their dashboards are invaluable.

Below the real time data displayed on the dashboard, you will find a graph for each measurement on a timeline of your choice. Everything from temperature, humidity, barometric pressure, all the way to solar radiation are captured and displayed on a timeline.

You can choose to view your data over the course of a day, week, month or a year. (Weather Underground even allows you to choose a custom period of your choice.)

Ambient Weather WS2902 Graph

Ambientweather.net Graphic Timelines

These graphs provide you with crucial data as to how the different weather element change over time. The barometric pressure graph for example, gives you a visual indication of how pressure is dropping or rising over time. The steepness of the changes in pressure also provides you with valuable information of how quickly changes are taking place.

Keeping track of these graphs and timelines will help you to be able to understand current weather conditions, as well as determining future weather events (and establish weather patterns) in your area.

If you don't know what these changes means, that's fine! These timeline graphs serve as an excellent teaching tool, as you can follow the changes on these graphs and see how the weather around you responds accordingly. You will very quickly start to see how certain changes correspond with specific weather events.

You can always verify your findings by looking up how different changes in weather elements influence the weather. You can find some helpful information in this article explaining different weather elements & terminologies and how it affects weather behavior.

Setting Up WiFi

Connecting your display console to your router via wi-fi is straight forward, but takes a little bit more concentration. Also make sure you follow ALL the steps and make notes of all settings (MAC addresses, IP settings, usernames and passwords). You will need it when connecting to the different online services or need to reconnect at a later stage.

You start by downloading the Ambient Tool for your iPhone or Android device. Follow the instructions on your device very carefully. Your instruction guide also takes you through the setup process step-by-step again.

(Please don't rush through this process without reading and following the instructions carefully, like yours truly. You end up having to redo everything several times and end up utterly frustrated with a lot of time wasted in the process. Ask me, I know!)

During the Wi-Fi setup you have the option to connect to both Ambientweather.net and Wunderground.com, each providing you with real-time data, detailed timeline graphs and the ability to record and store all your measurements.

I opted to register on both, but you can just register on just one site as both provide you with similar functions and services. I would really recommend registering with Weather Underground  (Wunderground.com).

By doing this you get all the benefits mentioned in the previous section. But for all intents and purposes, you also just became part of a worldwide weather forecasting service!

Your weather station is integrated into a network of thousands of weather stations worldwide, which measurements are used by Weather Underground to make accurate weather forecasts the world over. 

And that's it! Your setup is now complete and you can start enjoying your new weather station.

You can find more information and pricing on the Ambient Weather WS-2902A Osprey here.

Performance, Quality And Accuracy

Which brings us to the all important questions. How well does the Ambient Weather WS-2902A Osprey perform? Does its quality stand up, and how accurate is its readings?

Well, luckily there is good news on all fronts. I may have already touched on some highlights, but here is a more thorough report...

Quality

As already mentioned at the start of this post, the thorough and secure packaging was already a very positive indication of what to expect. This was confirmed by both the look and feel of the different components as I unpacked and assembled them.

Ambient Weather WS2902 Finished Assembly

The whole assembly feels very sturdy, with the plastics having a high quality feel to them. Everything fitted securely and after assembly, the completed sensor array really feels like it can stand up to some rough weather. (Obviously it will not necessarily survive a Category 5 hurricane. But then again, neither will much of the house it is attached to...)

Similarly, the display console feels solid with all the onscreen readings and icons logically laid out. It has 3 brightness adjustments settings (bright, dim, off). With your AC Adapter connected you can make use of all three settings.

The display console screen is bright and easily readable from directly in front or slightly above the unit. Its viewing angle is bit limited though, which means readability becomes a bit difficult when nor directly in front of the console.

This is not a real issue for me though, as you can just move slightly to get a better viewing angle. Also when you spend more time, taking readings and doing some analysis, you will probably be doing it from your laptop or mobile device's online hub & dashboard.

Both of them (Ambient Weather or Weather Underground's onscreen consoles) have all the real-time information the console has, plus all the extra tools for some more in-depth weather analysis and research.

After assembled and positioned in place, the sensor assembly sits firmly in place with all moving parts going about their business quietly and efficiently.

Obviously over the coming years, I will have a better impression of how well everything is holding up. Judging from feedback I got from users who had the same station for over a year, I am not foreseeing any problems   

Performance And Accuracy

Performance

During installation, I was setting aside some time for the sensor array and display console to synchronize. (From past experiences I knew this can a while.)

Ambient Weather Display Console

This turned out to be unnecessary, as both devices connected to each in less than a minute after being switched on. The display console started displaying the data it receives from the sensor array within seconds, after which it stayed continuously updated every 16 seconds (which is the set period for the sensor array to wait between sending the latest data).

Even after moving the display console around several times after installation, the devices stayed synchronize and updated. This is very impressive.

What is even more impressive, is the consistency with which the online services from Ambient.net and Wunderground.com are keeping the online dashboards and timeline graphs updated. (The Ambient Tool can be used to set the weather console to send updates with intervals ranging from 1-5 seconds via wifi to the selected online hub.)

Accuracy

The first thing I did after my sensor array and display console synchronised (and giving it a few hours to stabilize in and the measurements to settle into a rhythm), was to start comparing my readings with my other personal weather systems and online weather services able to provide me with accurate readings from my location.

Ambient Weather WS2902 Installed

I was extremely impressed by the results to put it mildly. The measurements are extremely accurate. They varied a bit more compared to my other (admittedly older and less sophisticated) weather stations, but not by much.

Compared to the professional online weather services for my area though, its measurements are almost 100% percent accurate. (There are some variation of between 0.2-0.5 °C in temperature and sometimes slightly bigger margins when it comes to humidity, but these are negligible differences and can simply be attributed to very localised differences in conditions.)

More importantly, the weather tendencies recorded by the WS-2902A Osprey very closely mirrors that of all local online weather services. A close eye will be kept on these weather tendencies over the coming months and years, and how they compare with professional weather forecasts.  

All in all, the WS-2902A Osprey really lives up to its reputation as a very accurate home weather station.

You can find more information and pricing on the Ambient Weather WS-2902A Osprey here.

Conclusion

From installation to giving you an objective impression, it should have become very clear that I am very impressed and satisfied with the Ambient Weather WS-2902A Osprey.

Maybe part reason I am so impressed and satisfied, is that many products are really overhyped, especially online. Whenever you do research on any product, reading reviews is almost like reading a series of "copy & paste" articles, all saying almost exactly the same thing. (I guess many of them are sponsored).

Either way, one gets so used to be underwhelmed, that it's really refreshing to find something that doesn't just live up to expectations but surpasses it. The Ambient Weather WS-2902A Osprey is definitely one such product.

If you didn't read the whole article, here is a quick summary of the pros and cons of the Osprey which I feel is relevant for any potential user: 

ADVANTAGES

Excellent Documentation & Support

Quality Design & Construction

Comprehensive Sensor Array

Accurate Measurement & Forecasting

Advanced Online Data Collection & Display

Solar Powered (Limits Battery Usage)

DISADVANTAGES

Too Advanced For The Beginner

Limited Viewing Angle (Display Console)


Somewhere in the future, I may look at adding the Davis Vantage Pro to get some of the most accurate and consistent readings available on the market. Before even considering it, however, it needs to be updated with a modern color display console and includes WiFi and Internet integration as standard. You can read my impressions of the Davis Vantage Pro here.

Feel free to leave me any comments, questions or suggestions, and I will get back to you as soon as possible.

Remember to join my  Mailing List  to be informed whenever a new article is released, and share new developments and helpful hints & tips.

Until next time, keep your eye on the weather!

Wessel


Choosing Your First Personal Weather Station – 3 Ideal Starter Systems

Your First Weather Station heading

So you finally decided to not just rely on the weather forecast anymore and take control of your personal weather by obtaining your own weather station. Good on you! But where do you start and what do you look out for?

To be honest I am actually excited for you, and a little jealous. My first little weather station, now about 20 years old (pictured left), really sparked my interest and my passion and thirst for understanding the weather. Getting to know how it worked and actually reflected actual weather conditions was a whole new adventure.

To be honest, I didn't really know exactly what I was buying back then. The 2 different temperatures being displayed (found out it is inside and outside temperature), the bar with different heights running from left to right look very cool. (Which is the bar indicating the barometric pressure over time). I won't go on about all the other the other features, but you get the idea.

Ok, back to reality. Personally, I really don't think it's necessary to go all out and get a complete weather system with and array of outside sensors, with a wireless connection to your base station, which logs to up to a year's data and connects to your wifi router.

So what you should you be looking?

A basic standalone unit and a simple outside sensor. Even basic personal personal weather stations come with more than you really need to get started and familiarize yourself with how everything works.

There are 3 weather elements your weather station should be able to measure:

  1. Inside Temperature (and outside temperature on your remote sensor)
  2. Air Pressure (barometric pressure with a build-in barometer)
  3. Humidity (moisture in the air measured by a hygrometer)

If you have access to these 3 important measurements, you will be able to learn how these readings correlates with the accompanying weather. Paying attention to them will help you to quickly learn and understand how they are able to reflect current and feature weather conditions.

The majority of home weather stations comes with a forecasting abilities (sun, cloud & sun, cloud, cloud & rain icons etc.) which is a result of the the units build-in algorithms and calculations based on the data it gets from the different sensor.

You don't need to blindly rely on these "forecasts". If they are fairly accurate though, it is a great way to start making your own forecasts as you learn to read the measurements and see how close you get to judging the weather correctly.

Right, lets get to the actual weather station. Keeping in mind that this will probably be your first personal weather station, I examined 3 systems that are very reasonably priced and got all the necessary basic functions built-in to give you a proper start. 

All 3 of them gave surprisingly accurate readings, are very user-friendly and have a decent quality design. In order of functionality and price, they are:

  1. La Crosse Technology 308-1425B
  2. Ambient Weather WS-2801
  3. AcuRite 00589

Depending on your needs, one may be more suitable than the others. Don't expect all the bells & whistles from advanced systems that are more than double the price or more. But in all honesty, you don't need all these extras to start with. The features and functions of these 3 devices are more than you need to start out with, and will probably keep you busy and interested for quite some time.

Lets take a closer look at each one in more detail:

La Crosse Technology 308-1425B

La Crosse is a  company dedicated to producing weather products and has been doing this for more than 30 years. From producing basic thermometers to advanced home weather systems, you don't need to be a rocket scientist to see that they know a thing or two about weather instruments.

As with both other systems in this review, it comes with an indoor base station, as well as an outdoor sensor. All 3 crucial weather variables during my introduction (temperature, air pressure, humidity), are measured by the La Crosse.

Here is a quick summary of the most important features:

  • Inside Temperature (Inside & Outside)
  • Humidity (Inside & Outside)
  • Barometric Pressure
  • 12 Hour Forecast with forecast tendency indicator
  • Air pressure trend indicator
  • 12/24 Hour atomic time & date

The base station has a large easy-to-read display. Some of the buttons are on the back of the display, which may make adjustments a bit tricky. If you don't need to access these buttons frequently though, this should not be an issue.

Performance is surprisingly good for a weather station within this price range. To test the accuracy of the outside sensor and base station, both were placed together. All readings were very closely matched. Temperature readings had a maximum difference of 2 degrees between the 2 units, which is more than acceptable for measurement and forecasting.

la crosse sensor

All major weather measurements are prominently displayed, which makes taking quick readings easy. It also has animated weather forecasting icons which include a forecasting tendency indicator which I find very useful. (Remember to try and make your own forecasts and compare it with the weather station's forecasts!)

A useful feature, is the ability to measure humidity below 19%. (If you are living in a dry region this ability is quite useful. I am mentioning this as some other weather stations and some of La Crosse's smaller weather stations don't measure humidity this low.)  

As this weather station is a basic unit aimed at the beginner, is doesn't have extra measuring capabilities like wind speed, wind direction and rainfall. From personal experience I can testify that you don't need these extras to start out with. For almost 10 years I used my "old" trusty unit that just measured the "Big Three" (temperature, humidity and air pressure) and it kept me busy for quite some time.

A highly recommended starter weather system with good accuracy and a great feature set at a very affordable price.

You can get more information and pricing on the La Crosse Technology 308-1425B here.

Ambient Weather WS-2801

Ambient Weather WS 2801

Ambient Weather is seen by many as the market leader for home weather stations by many users, especially for the more serious weather enthusiast. (Not so sure what Davis Instruments will have to say about that, but that is a topic for another discussion).

The WS-2801 is another solid product from the company. Not only does it measure the 3 key weather elements (temperature, air pressure, humidity). It also incorporates memory for min/max temperature & humidity display and support for up to 3 separate outdoor sensors.

Additionally, it claims a fairly accurate 24-48 hour weather forecast ability. (More on this a little later.)

This weather station does not have all the extra feaures of some other similarly priced competitors, but does what it promises very well. It offers the important basics, and focus on quality and accuracy.

It does offer all the important features you need though, plus a couple of extras which include:

  • Inside Temperature (Inside & Outside)
  • Humidity (Inside & Outside)
  • Barometric Pressure
  • Air pressure trend indicator
  • 24-48 Hour Forecast with forecast tendency indicator
  • Min/Max memory for temperature & humidity
  • -40°F - 140°F Outside temperature range (with lithium batteries)

The base station's display is clear and easy to read. It also had 3 adjustable levels of brightness when plugged in. (It uses the 2 lower brightness settings and the screen turns off after a few seconds when not plugged in and the backup batteries are used.)

As to be expected from a weather station aimed at the more serious user, the build quality is very good. I also found the ability to calibrate the device very useful for getting more accurate readings.

I didn't find the need, but the ability to support 3 outside sensors is very useful for users who live on a large property, or need to take measurements at different locations to get a more accurate picture of weather conditions.

(Just remember to have your outside sensors close to the base unit when installing to allow them to synchronize with each other. After syncing you can always move them outside or as far away as you are still able to receive their signals)

ambient sensor

Just a quick word on the 24/48 weather forecast claim. This is not a big issue, but please don't rely on the weather station to give you an accurate 48 hour forecast. I couldn't confirm or disprove these claims yet, but that's not the point. The capabilities of any personal weather station, even high-end professional home systems are limited by their sensors.

Their forecasts are made based on changes in temperature, humidity and barometric pressure. (High-end models also measure wind speed, wind direction and solar radiation, and include them in their calculation as well.)

However, weather is too complex and change too often to be accurately judged over 2 days. The sensors of any personal weather station don't have the ability to see the "Big Picture" and weather systems approaching hundreds of miles away.

This is my personal opinion and should be seen as just that, but based on years of experience and knowledge of how feature weather conditions are calculated, it's important that you should be aware of this "limitation". Professional national weather forecasting stations have the advantage of satellite images, radar imagery and weather balloons to see and detect changes in weather hundreds or more than a thousand miles away.  

Having said that, what you are getting with the Ambient Weather WS-2801, is a solid professional beginner weather station. It is a very good start into the world of weather and forecasting.  

You can get more information and pricing on the Ambient Weather WS-2801 here.

AcuRite 00589

AcuRite 00589

AcuRite is well-know consumer brand. Not so much seen as a dedicated producer of weather related products, it is sometimes not taken very seriously by weather enthusiasts.

There have been some claims of unreliable readings and poor build quality from users over the years. Some of these claims may be founded and some unfounded, but before making any judgment based on rumours and opinions, read on.

The AcuRite 00589 was designed to provide you with an easy-to-use, feature packed and intuitive personal weather station at a very affordable price. And it really does deliver plenty of bang for the buck. So does it make up for its sometimes "bad" reputation as an unreliable device with a a sub-par build quality?

Well to be honest. I was actually very pleasantly surprised. Does it look rock solid and sturdy? No, not all. To be honest, the plastic housings have a fairly cheap look and feel to them. But looks can be deceiving...

As far far as features go the AcuRite delivers more features than any of the other system tested here. Temperature, humidity and air pressure are obviously covered. Additionally, the sensor unit can measure wind speed, with the included anemometer.

A quick look at the important features of the AcuRite 00589:

  • Inside Temperature (Inside & Outside)
  • Humidity (Inside & Outside)
  • Barometric Pressure
  • Air pressure trend indicator
  • 12/24 Hour Forecast
  • Wind Speed (current, peak and average)
  • History Chart for temperature, wind speed and barometric pressure
  • High/low data (daily, monthly and all time)

Everything works right out of the box, is extremely easy to setup and use. The colour display of the base unit is bright and easy to read. It's is also very easy and quick to setup and use. My only two main criticism is that the display can be difficult to read at an angle. It is also not a real colour display, but coloured glass illuminated by the LCD display.

So, let's address the main concerns first. Quality wise I couldn't find any real fault. Although it doesn't look or feel like it is built like a tank, everything fits well together, and nothing in particular looks like it can break or fail easily.   

Problems occurring over the course of time seems to be the biggest potential problem. I couldn't judge as I didn't have the unit long enough to make a judgement, so I turned to fellow users and other long-term tests.

AcuRite sensor

It became clear very quickly that durability over time seems to be a real problem. Some users reported failure of the outside sensor unit after only 2 months. Others reported failure after a year of usage. Then there are users who were very happy and didn't report any problems.

I can also not testify as to the weather conditions the stations that failed, were subjected to. (Please note: No weather station will survive extreme temperatures with sustained gusts of hurricane level winds over time.)

After some further research, I can make the following recommendation. The weather sensor unit seems to have a limited lifespan, especially in regions experiencing extreme weather conditions. In other words, see this weather station as a feature rich unit that is easy to use, but may be need to be replaced as some point.

As far as accuracy is concerned, I got mixed results. During cold weather, very accurate measurements can be taken. When it got very hot however, the temperature readings started to become a lot less accurate. In general though, it remains in the acceptable range.  

Wind speed readings also seems to be a bit erratic. As placement is crucial for accurate wind speed measurement, make sure the anemometer is placed at least six feet above ground level, with no housing structures and trees nearby.

So is the AcuRite 00589 worth it at all? It all depends on your goals.

If you are looking for a basic reliable personal weather station you plan on keeping for some time, then you may want to give it some thought. It may last you for quite some time, but just be aware of this potential reliability issue.

If you are looking for a beginner weather station with a good feature set and ease of use, which you plan to use as a stepping stone or starting point to get you feet wet before moving up to the next level, the Focusrite will be ideal for you. (It may even last you for many years to come.)

One last remark. The 00589 is a best seller on many major online stores, so maybe many of those criticisms are mostly the exception to the rule...

You can get more information and pricing on the AcuRite 00589 here.

Conclusion

If you were looking for a good option to consider for a starter personal weather station, you now have 3 good options to choose from. Each one has its own strengths and weaknesses and depending on your needs, one may be a better fit than the others for you.

With all 3 personal stations being-budget friendly, they will not break the bank. Apart from the fact that all these systems are well researched and comes highly recommended, when/if the time comes to replace them for a higher-end or different weather station, you won't be left feeling that you wasted your money on something not worth your while. 

Feel free to leave me any comments, questions or suggestions, and I will get back to you as soon as possible.

Remember to join my  Mailing List  to be informed whenever a new article is released, and share new developments and helpful hints & tips.

Until next time, keep your eye on the weather!

Wessel

Also Read

Fallstreak Holes: What They Are And How They Form
Many weather occurrences, especially cloud formations, sometimes produce unique but also puzzling phenomena. Fallstreak holes are one such occurrence, but[...]
Bubble Clouds: Defining Mammatus Clouds And How They Form
Many cloud formations always manage to put on a spectacular visual display, but Mammatus clouds can look ominous and threatening.[...]
Noctilucent Clouds: Defining Night Shining Clouds And How They Form
Some cloud formations often result in some of the most awe-inspiring and spectacular displays nature can produce. Noctilucent clouds are[...]

Notice: ob_end_flush(): failed to send buffer of zlib output compression (1) in /home/ownyourweather/public_html/wp-includes/functions.php on line 5373

Notice: ob_end_flush(): failed to send buffer of zlib output compression (1) in /home/ownyourweather/public_html/wp-includes/functions.php on line 5373