

Installation And First Impressions Of The Ambient Weather WS-2902A Osprey Weather Station
Installation And First Impressions Of The Ambient Weather WS-2902A Osprey Weather Station
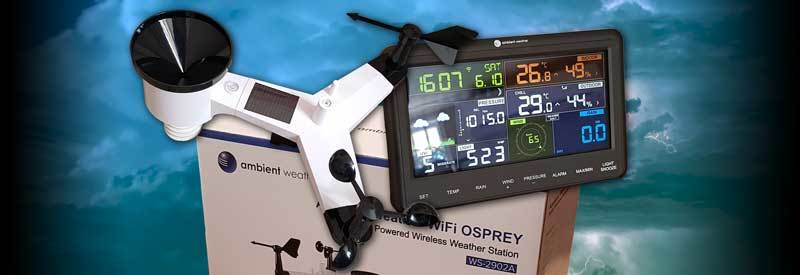
After years of working with various personal weather stations, it was time to upgrade to an advanced home weather station with more sensors and the latest technologies needed to stay connected and updated.
I needed to upgrade to a modern weather station that had all the sensors needed to make more accurate and consistent measurements and predictions. There are many good options out there, so a lot of research had to be done.
I thoroughly researched all options, and there are very good home weather stations available. Some which look great and has impressive displays and sensor assemblies. Some came highly recommended as very professional with a price tag to match.
 I needed something that is advanced, reliable, and accurate. Those were my three biggest requirements. One name kept popping up: the Ambient Weather WS-2902A Osprey. After some further research, I finally took the plunge and am now the proud owner of the very same personal weather station.
I am glad to report that this decision has been a good one. (Yes, I made some bad ones in the past.) In this article, I am taking you through the installation process and my impressions of the Ambient Weather WS-2902A Osprey.
Installation And Setup
Packaging
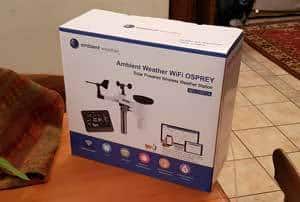
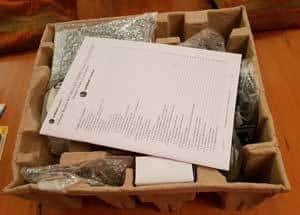 For me, the first real indication of a quality product is the way it is packaged. The WS-2902A Osprey didn’t just come in a sturdy box, but ( I guess for transport purposes) was packaged within an even bigger box with bubble wrap to give it extra protection.)
The different components were securely wrapped, each one in its own compartment. Unpacking and unwrapping took quite some time, but that just goes to show how well protected and insulated every last piece of the weather station came packaged right from the start. This really instilled a sense of confidence and reassurance in my choice of purchase.
Components And Assembly
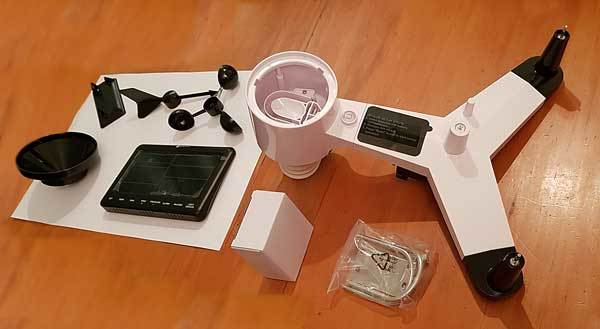
About five or six different components came packaged separately, which had to be attached to the main sensor array. This was a quick and easy process, though, not even taking 15 minutes. (A rather hefty manual with a quick-start guide was at hand with step-by-step instructions which made it easy for even the least technically inclined among us.)
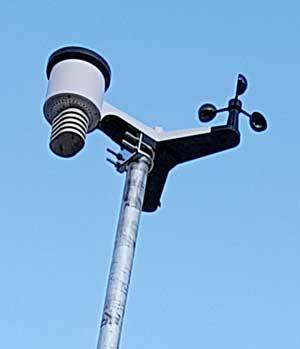
The whole assembly feels very sturdy, with the plastics having a high-quality feel to them. Just needing a small Philips screwdriver to fasten the different components, the wind vane, anemometer, and funnel for the rain gauge, were quickly and securely attached.
All that remained was for two AA batteries to be installed and the protective seal of the solar panel to be removed, and the sensor array was ready to be mounted. After battery installation, the red transmitter light lit up and then started flickering intermittently to indicate that the sensor array was broadcasting.
The Ambient system comes with a bracket set (complete with a little spanner to fasten the sensor array) with a back-plate that can be fastened to a 1-2 inch pole. The pole doesn’t come standard but can be purchased from Ambient Weather or, even better, from any hardware store in your area at a fraction of the cost.
 Care should be taken as to where to install your sensor array for the most accurate measurement. The included instruction guide helps you out with determining the best position, but I dedicated a whole article to optimal sensor placement, which you can find here.
Just a quick note on positioning. The instructions are not very clear on this, but make sure your sensor array is pointing in the right direction when fastening it in position. The arm with the rain gauge attached to it has a little arrow that points to the north.
(If your assembly is pointing in the wrong direction, the wind direction will not be correctly indicated on your display and connected applications, and may even influence forecasts and other calculations.)
You can use a compass, the digital compass on your cell phone or even Google Maps to determine where north is in your area.
And that’s it. Your sensor assembly is now installed & mounted, and ready to be connected.
Display Console Setup
Setting up your display console is just as easy and intuitive, and again, your installation guide takes you through the process step-by-step. (Initial setup took me about 15 minutes maximum.)The display console feels solid with all the onscreen readings and icons logically laid out.
Make sure to insert the three AAA batteries, as well as connect the AC Adapter to a power outlet, to make sure the unit remains operational at all times and the display stays on. (The batteries will make sure the unit stays operational during a power failure, but the AC Adapter needs to be connected for the screen to remain permanently on.)
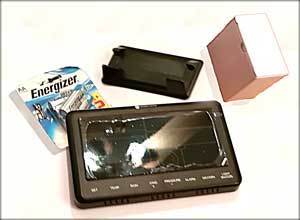 After removing the protective screen cover and deciding whether you are going to use the fold-out legs at the back of the unit or the included base stand to make the console stand upright, your console is ready to be set up.
It is important that you follow ALL the steps in the setup process, especially when it comes to time, date, location (timezone and hemisphere), and initial barometric pressure settings. This will ensure you get accurate readings, as well as relevant and correct calculations and forecasts for your location.
The WS-2902A Osprey is designed to be used anywhere in the world, and during setup you are able to customize the console to display all data in the units of your choice, depending on where in the world you live.
Whether you live in an area still using the Empirical System (feet, inches, mph), or the metric system (millimeters, meters, km/h), you can set up the console to display all data collected in the units appropriate for your region.
And with the display console all set up, your initial installation is all done.
(Just remember to hold the console relatively close to the sensor array location, about 5-10 feet, while setting up to allow the two units to synchronise. After synchronization, you can move the console to its permanent position.)
If you are unsure about where to place your display console, I dedicated a whole article to the indoor placement of your weather station, which you can read in this article.
Wireless Connection Setup
The Importance Of Connecting Your Weather Station
Setting up your wireless connection and connecting to your online portal is arguably the biggest appeal and the most important part of setting up the Ambient Weather WS-2902A Osprey. For me, this is where the real magic happens. But why?
Being able to connect to Ambient Weather’s own network or joining Weather Underground does much more than just allow you to mirror and show all the display console’s data. The additional tools provided by their dashboards are invaluable.
Below the real-time data displayed on the dashboard, you will find a graph for each measurement on a timeline of your choice. Everything from temperature, humidity, and barometric pressure, all the way to solar radiation, is captured and displayed on a timeline.
You can choose to view your data over the course of a day, week, month, or a year. (Weather Underground even allows you to choose a custom period of your choice.)
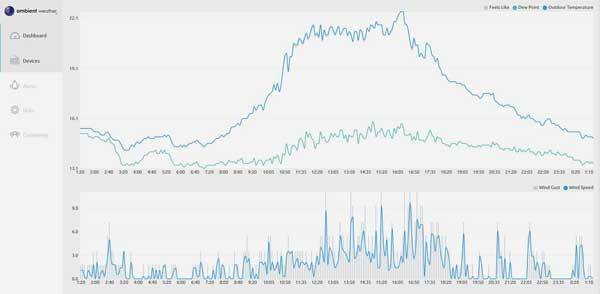 These graphs provide you with crucial data as to how the different weather elements change over time. The barometric pressure graph, for example, gives you a visual indication of how pressure is dropping or rising over time. The steepness of the changes in pressure also provides you with valuable information about how quickly changes are taking place.
Keeping track of these graphs and timelines will help you to be able to understand current weather conditions, as well as determine future weather events (and establish weather patterns) in your area.
If you don’t know what these changes mean, that’s fine! These timeline graphs serve as an excellent teaching tool, as you can follow the changes on these graphs and see how the weather around you responds accordingly. You will very quickly start to see how certain changes correspond with specific weather events.
You can always verify your findings by looking up how different changes in weather elements influence the weather. You can find some helpful information in this article explaining different weather elements & terminologies and how it affects weather behavior.
Setting Up WiFi
Connecting your display console to your router via wi-fi is straightforward, but takes a little bit more concentration. Also, make sure you follow ALL the steps and make notes of all settings (MAC addresses, IP settings, usernames and passwords). You will need it when connecting to the different online services or need to reconnect at a later stage.
You start by downloading the Ambient Tool for your iPhone or Android device. Follow the instructions on your device very carefully. Your instruction guide also takes you through the setup process step-by-step again.
(Please don’t rush through this process without reading and following the instructions carefully, like yours truly. You end up having to redo everything several times and end up utterly frustrated, with a lot of time wasted in the process. Ask me, I know!)
During the Wi-Fi setup, you have the option to connect to both Ambientweather.net and Wunderground.com, each providing you with real-time data, detailed timeline graphs, and the ability to record and store all your measurements.
I opted to register on both, but you can just register on one site, as both provide you with similar functions and services. I would really recommend registering with Weather Underground (Wunderground.com).
By doing this, you get all the benefits mentioned in the previous section. But for all intents and purposes, you also just became part of a worldwide weather forecasting service!
Your weather station is integrated into a network of thousands of weather stations worldwide, whose measurements are used by Weather Underground to make accurate weather forecasts the world over.
And that’s it! Your setup is now complete, and you can start enjoying your new weather station.
You can find more information and pricing on the Ambient Weather WS-2902A Osprey here.
Performance, Quality And Accuracy
Which brings us to the all-important questions. How well does the Ambient Weather WS-2902A Osprey perform? Does its quality stand up, and how accurate are its readings?
Well, luckily there is good news on all fronts. I may have already touched on some highlights, but here is a more thorough report…
Quality
As already mentioned at the start of this post, the thorough and secure packaging was a very positive indication of what to expect. This was confirmed by both the look and feel of the different components as I unpacked and assembled them.
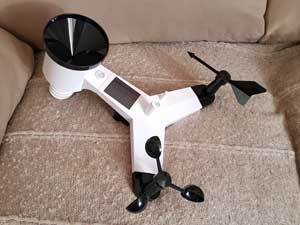 The whole assembly feels very sturdy, with the plastics having a high-quality feel to them. Everything fit securely, and after assembly, the completed sensor array really feels like it can stand up to some rough weather. (Obviously it will not necessarily survive a Category 5 hurricane. But then again, neither will much of the house it is attached to…)
Similarly, the display console feels solid, with all the onscreen readings and icons logically laid out. It has 3 brightness adjustment settings (bright, dim, off). With your AC Adapter connected, you can make use of all three settings.
The display console screen is bright and easily readable from directly in front or slightly above the unit. Its viewing angle is a bit limited, though, which means readability becomes a bit difficult when not directly in front of the console.
This is not a real issue for me though, as you can just move slightly to get a better viewing angle. Also, when you spend more time taking readings and doing some analysis, you will probably be doing it from your laptop or mobile device’s online hub & dashboard.
Both of them (Ambient Weather or Weather Underground’s on-screen consoles) have all the real-time information the console has, plus all the extra tools for some more in-depth weather analysis and research.
After being assembled and positioned in place, the sensor assembly sits firmly in place with all moving parts going about their business quietly and efficiently.
Obviously, over the coming years, I will have a better impression of how well everything is holding up. Judging from feedback I got from users who had the same station for over a year, I am not foreseeing any problems.
Performance And Accuracy
Performance
During installation, I was setting aside some time for the sensor array and display console to synchronize. (From past experience, I knew this could take a while.)
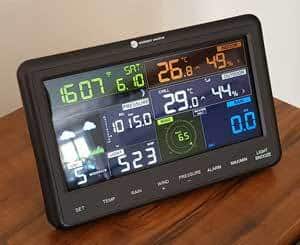 This turned out to be unnecessary, as both devices connected to each other in less than a minute after being switched on. The display console started displaying the data it receives from the sensor array within seconds, after which it stayed continuously updated every 16 seconds (which is the set period for the sensor array to wait between sending the latest data).
Even after moving the display console around several times after installation, the devices stayed synchronized and updated. This is very impressive.
What is even more impressive is the consistency with which the online services from Ambient.net and Wunderground.com are keeping the online dashboards and timeline graphs updated. (The Ambient Tool can be used to set the weather console to send updates with intervals ranging from 1-5 seconds via wifi to the selected online hub.)
Accuracy
The first thing I did after my sensor array and display console synchronised (and giving it a few hours to stabilize and the measurements to settle into a rhythm) was to start comparing my readings with my other personal weather systems and online weather services able to provide me with accurate readings from my location.
 I was extremely impressed by the results, to put it mildly. The measurements are extremely accurate. They varied a bit more compared to my other (admittedly older and less sophisticated) weather stations, but not by much.
Compared to the professional online weather services for my area, though, its measurements are almost 100% accurate. (There are some variations of between 0.2-0.5 °C in temperature and sometimes slightly bigger margins when it comes to humidity, but these are negligible differences and can simply be attributed to very localised differences in conditions.)
More importantly, the weather tendencies recorded by the WS-2902A Osprey very closely mirrors that of all local online weather services. A close eye will be kept on these weather tendencies over the coming months and years, and how they compare with professional weather forecasts.
All in all, the WS-2902A Osprey really lives up to its reputation as a very accurate home weather station.
Conclusion
From installation to giving you an objective impression, it should have become very clear that I am very impressed and satisfied with the Ambient Weather WS-2902A Osprey.
Maybe part of the reason I am so impressed and satisfied is that many products are really overhyped, especially online. Whenever you do research on any product, reading reviews is almost like reading a series of “copy & paste” articles, all saying almost exactly the same thing. (I guess many of them are sponsored).
Either way, one gets so used to being underwhelmed that it’s really refreshing to find something that doesn’t just live up to expectations but surpasses them. The Ambient Weather WS-2902A Osprey is definitely one such product.
If you didn’t read the whole article, here is a quick summary of the pros and cons of the Osprey, which I feel is relevant for any potential user:
ADVANTAGES
-
- Excellent Documentation & Support
- Quality Design & Construction
- Comprehensive Sensor Array
- Accurate Measurement & Forecasting
- Advanced Online Data Collection & Display
- Solar Powered (Limits Battery Usage)
DISADVANTAGES
-
- Too Advanced For The Beginner
- Limited Viewing Angle (Display Console)
Somewhere in the future, I may look at adding the Davis Vantage Pro to get some of the most accurate and consistent readings available on the market. For now, though, the Ambient Weather WS-2902A Osprey serves all my needs and then some.
Until next time, keep your eye on the weather!